Sunday, December 16, 2012

Chicago Concert Report

Mrs. S and I had occasion to visit Chicago recently, a great town that is just like New York in a lot of ways, except where New York never sleeps, The mid-westerners of Chicago roll up the sidewalks at 10:30 or so. Be that as it may, on our first night we managed to procure second row tickets to a fine double bill of Gonzalo Rubalcaba and Stefon Harris.

No confusion about when the concert takes place: TONIGHT!
Both of us were quite tired from the days travels and sight-seeing, and it was warmish outside, making for a stifling hot hall inside.I wish I could report that we fought through that and enjoyed the concert, but alas, the musicians and the environment failed to entertain us as well as I had hoped.

Rubalcaba opened with a solo piano act and it was, in short, technically fantastic. I’d never heard such dynamics and polyrhythmic lines and counters before. The songs were well selected, but very similar sounding, so I focused on his playing and was able to enjoy it more. Somebody’s cell phone went off way in the back, and it was one of those annoying hip-hop ring tones with rockets and thumping bass, and it kept going, and going, and going. Finally, Rubalcaba stopped to wait for the dumbass to shut off his or her phone, and when he did, everybody clapped because they thought the song was over. If it’d been me, I would have bowed and walked off the stage right then with a shout of, “You’re on, Stefon!” and I never would have looked back. Rubalcaba, on the other hand, had more patience than I, and he played out his set and a mediocre encore.

One concert, two Steinway pianos. Nice!
Stefon Harris was next, and he was fantastic. He was joined by Nicholas Payton, who is a superb trumpeter but unfortunately, on this night, he was a one trick, circular breathing pony. His solos really lacked depth and ingenuity. David Sanchez was also in tow, and while his solos were a little more fluid and better conceived, they were long and took too long to build up the tension, with the release coming only after the audience was exhausted and over-prepared. This may have been an unfortunate side effect of their band, Ninety Miles, blending several songs into long (thirty to forty minutes) operettas that again, the audience just couldn't handle. Still, Stefon’s playing was amazing, and I’m always up for good vibraphone music.

The walk back to the hotel was where we realized they had shut down the city while I was watching the concert and trying to keep Mrs. S awake. (Yeah, that kind of jazz was not her bag, at all.) At least, nobody begged for money during that twenty minute walk.

We’ll do Chicago again, sometime, but we’ll definitely wait for a better concert choice next time.


Monday, November 26, 2012

If you're going to have a 130-year old piano serve as your bar...


...you might as well fill it to the brim with good stuff!

A friend of mine who lives and works (and drinks) in Asia (hey Steve!) recently posted a nice shot of bar that had an impressive array of potions and medicines. As I was looking at it, however, while I wouldn't say I was unimpressed, I got the feeling that my home bar had as much, and possibly more, liquor as the bar my friend was drinking at. Although my bar lacks diversity within ingredient categories (for instance, I normally don’t stock more than one gin, or vodka, or such at one time), it makes up for this in sheer breadth of scope and overall quantity. (After all, this is a bar, at my house, not an establishment open for business.) Anyway, here’s the bar stock just before the holidays, so you can judge for yourself. As much as booze and jazz go together, after this entry, I’ll stick to drinking booze and writing about jazz.

Hard to see everything, because the small bottles disappear under the front rim of the piano, but they'd be obscured by bigger bottles if you put them in the back.
Very back row, left to right: Romariz Colheita Port, Vintage 1963 (in the wood box, same age as me – I was told it would be best after it was 50 years old, so we get to drink it after my birthday next year), Choya plum wine, Crystal Head vodka (in the skull right under the light, personalized and signed by the distillery owner, Dan Ackroyd), Hibiki 17-year single malt whiskey, peach brandy (in Paul Masson re-purposed brandy bottle), Tuaca, Cherry Heering, Grenadine, Benedictine, Bombay Sapphire gin (x 2 - a man needs his gin), Jack Daniels (x 2 - a man needs his JD), Cointreau, Gran Marnier (x 2 - a man needs his...you know), Jack Daniels single barrel whiskey, X.O. brandy (in repurposed bottle, so I forget the brand, but I think it’s nothing too special – which is to say, it’s not the Suntory I bought in Japan over the summer because I drank that already), small bottle of Navan vanilla liqueur (I think) that came with one of the Gran Marniers.

A little better to get the scope of 47 bottles, but still, wide enough that  the camera can't focus in on every single bottle (still can't see the small ones down front, either)
In the three crystal decanters (at right): Sandeman dry sherry, Sandeman ruby port, vodka (no idea what brand, but it’s cheap stuff, probably Smirnov)

Back row of the bottle well (L-R): Bols blue curacao, Bols blackberry brandy, Bols crème de Cacao, cherry brandy, apricot brandy, Kubler white absinthe, Lucid green absinthe (x 2 - a man...never mind), St. Germain elderflower liqueur

Middle row (L-R): Campari, Applejack, Aperol, Calvados (that’s three apple drinks in a row), Kahlua, Old New Orleans spiced rum, Bacardi dark rum (in  re-purposed Old New Orleans bottle), Bacardi white rum (also in Old New Orleans bottle)

Front row (L-R): Angostura bitters, Sauza agave tequila, Pepe Lopez triple sec (thereby closing out the Mexican section of the bar), Laphroig single malt, Alize Coco coconut liqueur, Wild Turkey rye whisley, Bailey’s Irish Cream (x 2 - my woman, Mrs. S, needs her Bailey's), Calvados (extra)

So, that’s 47 bottles of booze by my count. Anybody thirsty besides me?

Sunday, November 18, 2012

How things happen…sometimes

As part-time subscribers to several symphonies within driving distance of our home, we often get notifications (emails) about upcoming events before they've been announced to the general public, and usually these are accompanied by offers (opportunities) to purchase advance tickets ahead of the crowd. Not all of these concerts and events have appeal for us, but for the ones that do, we are usually pretty quick on the uptake when it seems our calendar is open on a given date.

This past week, the Nashville Symphony hit Mrs. S’s inbox with a Chick Corea/Bela Fleck concert next March. She comes in the room, tells me about it, and I’m like, Hell yeah! After she called me over to pick out tickets, we were $165 lighter and booked for a March 22 trip to Nashville.

Mrs. S kind of started wondering about why I was so anxious to try and see Chick Corea, especially with Bela Fleck, who we've already seen once. I showed her my chunk of Chick CD’s and she wiki’ed and Googled him, and was just as excited as I that we are going to see him. Still, I told her, if you ever see we have a chance to see him with Gary Burton, you don’t even have to ask me – just book it and I’ll cancel everything to go to the concert.


The next day, the Alys Stephens Center magazine,The Center, containing an article that Mrs. S and I agreed to appear in, arrived in the mail. One of the first concerts of the new season is, believe it or not, ChickCorea and Gary Burton. I was all over the email the next day, and managed to secure (I think, maybe, no confirmation yet) our usual contributing members’ seats in the front row. I am needless to say, ecstatic. Mrs. S asked if we wanted to sell out Nashville tickets, but I kind of don’t think so. We’ll see how we feel after the Birmingham concert.

And that’s how things happen…sometimes.

Sunday, October 21, 2012

Never a bad time for Tyner

I commented about a year ago after Mrs. S and I saw Sonny Rollins that I felt attending concerts of these aging musicians was important because they provide links to some of the great jazz stars of the past. You go and see Sonny Rollins, a sort of protégé of Miles Davis, and suddenly, you are connected (in a manner of speaking) to Miles himself. If you see Herbie Hancock (review here), Sonny Rollins (review with Herbie Hancock photos here), and Ron Carter (who I haven’t seen yet), you have a three way connection. What’s more, these connections are through old people (obviously) who not only aren’t going to be around forever, they might not be around much longer. So naturally, when we found out McCoy Tyner was subbing for Charlie Haden in a concert in Nashville, we immediately jumped for tickets.


And last week, we saw Mr. Tyner at the Schermerhorn Symphony Center, and the connection to John Coltrane (pretty much my first, I think) was established. McCoy’s not nearly as in good shape as some of his counterparts, but he looked good. He moved slow getting to the piano, but he moved his hands fast once he was there. His accompanying band was good. Very competent, but nothing too outstanding. I sort of got the feeling they were laying back so McCoy could shine through. Because McCoy Tyner was a semi-last-minute replacement for Haden, they went with a much more typical-of-jazz approach in that they sort of called out tunes as they went along and they actually had to look around and coordinate their solos on the fly. It was, more or less, a jam session.


I felt that McCoy’s playing was a little loose at times, and I honestly couldn’t tell if he was hitting all the right notes or not.  One thing’s for sure: the Steinway piano he was playing sounded very sharp and clear, with huge solid bass notes that pushed the highs up, and a clear, bright upper register that positively floated above those long, fat bass notes. And of course, McCoy loves those thick, two-handed block chords, so even if his fingers strayed a little here and there, you were still getting these full, resonant, compelling tonalities that had a tendency to sweep and swell in unexpected places. The highlight for me was the first song after intermission, Walk Spirit, Talk Spirit. (If I could find the lead sheet for it, I’d play it myself.) It’s so typically Tyner, and it was really the only song the band sounded all together on.

I didn’t feel Coltrane at the concert, but I think he was there. Somewhere.

I hate to drive two hours and not be “wowed”, but I hate even more to skip it and miss my chance at a connection to one of the vital scions of jazz. That is to say, I’d do it again, and I no doubt will, someday. Wouldn’t you?

Sunday, October 14, 2012

The Bar is Open

Pretty much all the time, too.


Open day...
Having a bar made out of a 130-year old square grand piano is a great thing. It’s a conversation piece:

Guest: What’s the ginormous piece of furniture?
Me: Open it and see.
G: Oh wow! A piano!
M: Not quite, fold the top up.
G: Oh wow! A piano full of alcohol! Can I have some?
M: Capitalist idea comrade!

It gives you someplace to put your liquor.

It looks good lit up in a dark room.

...and night!
Did I mention it’s full of liquor?

There's still room for more...
Yes, I spent way too much money on it. (Don’t even ask.) Yes, I spent way too much time on it. (Two and a half years.) It’s way too big. (6’ x 3’ x 3’.) It’s heavy as all hell. (About 215 pounds, down from about 560.)

And it’s something that, once its novelty and usefulness has gone, I will part with it either by giving it away or throwing it out. (After all, who’s going to want it, much less part with money to get it?)

I see Kahlua, and absinthe (two kinds), and XO brandy, and...wait...is that...is that SINGLE BARREL JACK DANIELS?!?! (Yes, it is.)
Still, it’s mine. And you can’t have it. But if you’re nice and you ask politely, you can probably have a little bit of what’s inside.

Now, to make some cocktails for me and Mrs S. If anybody needs me, I’ll be over by the piano.

The Completion

You know, truth be told, this piano fought for its life to the very end. It just didn't want to go back to being a playable piano, but after that, it wanted even less to be a bar. I was not satisfied with an unplayable piano taking up the kind of space that this one does. It’s just ridiculous. So I made up my mind to make it into something mildly pretty and completely useful. Since I’m a bit of a boozaholic, a bar seemed a good fit.

But truly, the piano fought me to the end.

Once I cleaned up the finish and vacuumed the felt, I moved the beast over to the stairs. Mrs. S helped again with moving the support boxes to change the height to go up the stairs, and then sliding the bar across the floor on an extra carpet we keep for playing poker in the garage. Now that it is about 350 pounds lighter than when I started, this process was not nearly as bad as it sounds. Once I had it on sawhorses in the dining room, the real fight began. 

Right away, the first leg (right rear) wouldn't go on because the felt was in the way. Since the felt on the back will not be seen by anybody, I was okay with just removing it. I had to smack the leg to get it in place, but that worked. Right front leg was mounted without any problem. Left back leg was a different story. Not only was the felt in the way, so was the sound board at the bottom of the bottle well.

Son of a -!

There were different sorts of approaches I could take, but I wanted to minimize the amount of work I had to do. I unscrewed just enough screws to lower the sound board to let the edges of the leg slip between the bar and leg. That was relatively painless and I quickly screwed the bottle well board back in place without checking clearance on the front left leg.

You’re probably expecting another “Son of a -!” here, but actually, the leg just grazed the sound board and I was able to get it on. About then Mrs. S wandered in and liked the look of the thing but suggested I reattach the pedal lyre. Even though I knew I removed the dowels that held it, I (for some screwball reason) thought, sure, why not? I crawled under the bar and remembered why not.

Legs on, sitting pretty on the floor. 
The bottle well is where the pedals used to go.

We went with just leaving the pedals positioned on the floor, more or less in place where they go. Good enough.

The keyboard, because it was originally designed to be pushed in and taken out went right back in, no problem. Hardly worth mentioning, but there you go.

Lights off, lid on. (This picture is not sequential with the others.)
Now for the lighting. Bad planning here again. I drilled holes for the light cords in the back of the piano toward the edges. Turns out that’s where the legs ended up. Had I not had some foresight (as I will relate in a moment), I would have had to drill the holes through the legs. That might not have been bad, however, the LED panels I bought actually came with a switch. Obviously, the switch needed to be at the front, where it could be reached, so the holes in the back wouldn't have been of much use anyway. Back when I was drilling holes for electrical cords, however, I didn't actually own the lights at the time, so I didn’t know what the cord configuration was going to be. Figuring I had nothing to lose, I drilled two more cord holes in the front of the bar.

Lighting installed. Notice the glare on the right where the piece of the piano is missing.

Good thinking, Eric.
  
I installed the switch, ran the cords, attached the lights and lit everything up. Worked like a charm except the cord length dictated one of the lights end up where a big chunk of the back of the piano had gone missing during the pin block removal process. I covered that up with the support rod from the pedal lyre (which doesn't have anywhere to attach to any more anyway).

Rod installed and glare gone. Looking good!
 I plopped the lid and support arms back in, and the bar, after only two and a half years, was complete!

The bar is closed, for now...
Time for a drink (next entry)!

Thursday, September 27, 2012

Al…..most………there…….


Last weekend, I decided a few things: I’m sick of my garage being filled with tools and a broken down piano. I’m sick of sacrificing my piano playing time for DIY labor on a piece of furniture. I’m sick of not looking for pianos because the one I have is not doing anything practical with the space it occupies. I just wanted the thing to be done with! So Saturday and Sunday, both, I put in whole mornings and partial afternoons and I have, at long last, wrenched the bar out of the piano, and have reached the point where, although I’m not finished, I’m down to just polishing and primping. The manly man work is done.
Not bad, if you don't look too close...
 The hardest part was getting the cheap felt to cover the surfaces, especially the back. Let’s face it: $3 a yard doesn’t buy you much quality when it comes to felt. (The one and half yards I bought for the piano when it was still going to be a piano cost over $100. The six yards I bought for the bar: $14.) Once I had the back covered, doing the inside was much easier. I used staple gun staples to hold everything down, and used decorative thumbtacks everywhere else. The result was reasonably neat and effective.
Nice neat felt, surrounded by trim, shelf brackets, and decorative tacks. (Note the height adjuster sound board nibs, already installed on the serial number shelf.)
 Installing the bottom in the bottle well was tricky, but certainly not hard. The hardest part was turning the piano over to drill the holes, but now that it is so light, even that wasn’t particularly difficult. The effect using the old soundboard is exactly what I was hoping to achieve.
Deep enough for those tall bottles of booze, except where the hitch pin block is, upper left. (That's according to plan, folks, believe it or not.)
 The shelves were another matter. There’s no good way to get tools into the crevices to drill holes and turn screws. I ended up installing bits of pin block sideways into the piano as shelf supports. I recycled the damper board as a shot glass shelf, and when the OEM serial number shelf didn’t turn out as expected, I installed the old music rack over the top of it, leveled with soundboard spacers and pin block (again). Both these shelves turned out quite nice.
Damper board as shot glass shelf. Note the trim in the corners already installed
With the keyboard, I got lucky. The rod I used to insert into the space wouldn’t go in with everything screwed down, so I took everything apart and screwed everything back together with the rod sitting about where I wanted. As I was tightening the screws, something suddenly snapped and settled, and boom! The rod was in place, looking nice and functioning exactly as I hoped it would. That almost never happened during the two years I was working on this piano/bar.
Music stand as shelf. Who wants a "Between the Sheets (of Music)"?
 All that’s left now is to polish it, screw the keyboard in, install the lights, and put the top back on. It’s about two hours of work at most. Then, just fill it up with booze and watch my guests’ eyes when I open it up the first time.
The just-about-finished product 
I’m so glad this is almost over.

Thursday, September 20, 2012

Why Quentin Tarantino is a millionaire...


and I’m not:

Because he shows characters viewing their situation unrealistically, then shows the reality. I, on the other hand, live that way. To wit, here’s what I wrote at lunchtime today, thinking I was getting a jump on things:

(Quote)

Tonight I was excited enough about what was formerly my piano to work on it during the week. With Mrs. S gone to some women’s business awards dinner and nothing much else to keep me occupied, I decided to put some time in on the bar on a Thursday night, taking advantage of the cars being already out of the garage and the cool evening air as well.

I started to put the felt on. I decided not to use glue, as it would be too messy and too permanent, and instead went with semi-decorative thumbtacks that I pounded in with a hammer with a piece of felt on the head. This proved to work pretty well and looks good, too. On the inside, I pulled the felt tight like a pool table surface and used my staple gun only at the edges and more decorative thumbtacks where needed. In the end, I glued just two pieces – the smaller ends in the bottle well. Everything else is stapled or tacked into place.

Once the felt was in, I glued in the serial number board over the hole on the left side of the piano. I also nail-gunned in the trim pieces to cover the felt seams and edges. While the piano was turned upside down for felt installation, I drilled holes for the shelves and went ahead and screwed them securely into position.

Before I started work on the felt, I taped and sealed (as good as I could) the bottom of the keyboard and I went ahead and poured acrylic on it to not only to secure the keys, but also to make them a little glossy and possibly as a prelude to building up the keys high enough to be level with the black ones so it acts as a kind of shelf (I’m not sure this will even work; I need to see what the acrylic dries like in the initial stages.)

All in all, it was a pretty productive evening.

(Fade to black, and, cut. Zoom in on my face, speaking sincerely into the camera.)

That’s what I imagined would happen tonight. What really happened is, the felt wasn’t cut straight, so I couldn’t align the easiest-to-align piece and ended up giving up because I couldn’t see very well in the dark. The liquid acrylic washed off the tape on the bottom of the keyboard and I ended up brushing out as much of it as I could. The keyboard is basically undamaged, but it’s not coated in acrylic, either. And mosquitoes positively ate me alive the entire time.
"Who's the sucker? That's RIGHT. I AM!!!!!!"
...and, CUT!

Imagination: The bar is practically done. Reality: No progress at all to speak of, lots of mosquito bites to show for the effort. Sucks worse than a mosquito.

Sunday, September 16, 2012

Ready for the final push


The piano is gutted. 

The hole is cut. 
Last look at an empty piano with a hole cut in it, before the final push
The felt is purchased. 

The case is stained. 

The keyboard is trimmed. 
L to R: The damper bar (shot glass shelf), the serial number board (hole cover), the reduced keyboard (thing to lean on)
The ends are painted. 

The trim is re-stained. 

The shelves are varnished. 

L to R: Sound board (bottle shelf), rod (keyboard spacer for glued down keys), keyboard blocks (original), trim (felt holder), second serial number board (auxiliary shelf)
The polish is ready. 

The plan is formulated.

I am ready for the final push. Next weekend, the hunk of antique furniture that was a piano becomes a bar.

Sunday, September 9, 2012

Another thing very few people have ever done

Believe it or not, I’ve been making good progress on my bar. Mrs. S. and I had a long discussion about whether to open a hole in the piano base to accommodate tall bottles of liquor or to install racks of some sort to lay everything on its side. I had two concerns: Having enough space to lay down that many bottles, and the cost of the racks. My original idea was to buy one of those modular racks and drill holes at an angle to allow them to sit diagonally. A rack set for 8 bottles (since four spaces would become unusable) would have been around $20, so to put up 30 bottles would have cost $80. Mrs. S’s rack idea would have cost a little less or a little more, depending on which racks I ended up buying. In the end, I decided opening a hole was going to be the most economical and would also leave me with the most space inside the bar for glasses, stirrers, and other accoutrements.

So I set to work.

I started at the hole for the sustain pedal rod and measured an approximately 12” x 36” slab. I measured and re-measured multiple times, not only because of the “measure twice, cut once” rule, but also to make sure I would be left with enough bottle space without endangering the overall integrity of the piano. Had I had proper tools, this job would have been a breeze and probably finished in about an hour, but because I was stuck with the circular saw and reciprocating saw in my homeowner’s DIY drill kit with low torque and weak (old) batteries, it took me two days with constant and steady recharging and I still did about a quarter of the job with a hand saw. And of course, my wood slab had a slight taper, so I tore a bunch of wood on the bottom of the piano getting the slab out, but when all was said and done, what was formerly my piano had a big hole in it and was 21 pounds lighter than when I started to open the hole.

One piano, with hole, coming right up. Make that a bar with a hole... 
While lying on the floor admiring my work from underneath, I noticed the sound board laying against the back wall. It gave me an idea. Rather than buy a non-descript, uninteresting piece of wood for the bottom of the hole, maybe I could recycle the sound board instead. Not only would it add interest to the piece, it would keep me from spending more money. I measured off a section, cut around the hitch pin block, preserving a piece for decoration, then cut it down to size. I sanded it and varnished it. It will need to be re-varnished once more before installation.

Actually, a pretty nifty piece of decorative wood, if I do say so myself.

I spent a lot of time sanding the inside of the bar, just trying to get everything close to even. I’m going to cover everything with sheets of felt, since there’s really nothing I can do with the worn, tore up, patched up wood on the bottom and sides. I still plan to install some mirrors and lighting as well (the last money I will spend on this beast).

Nothing but cosmetic work from here on out. Lots of scraping, sanding, gluing, covering, and refinishing. I think one or two more weekends and one or two weeknights should let me move the bar back into the house by the end of the month. 

I am getting close.

Thursday, August 9, 2012

On the face of it, really, what is veneer?


This entry is a continuation of the previous two. If you haven't read them, you should check them out.

Or, be confused. What do I care?

The last pile of chunks in an otherwise empty shell of what was once, a piano.
This past weekend, I went back to the grunt work and removed the veneer, also pulling out the last of the chunks I intended to pull out, and then rough smoothed (how do you like that oxymoron?) the inner surface with the scraper attachment on my oscillating tool. 
Veneer off. Notice the fragments, sitting inside to the left...
That means, I pulled off the obvious slivers and gouged pieces that made the surface uneven and then used my oscillating tool and 60 grit sandpaper to clean up every newly exposed surface. 
Exposed: The gutted result. As much as bar as a piano, or a casket, or, or, or...
I then deposited one whole sixteen ounce can of wood filler into the crack and gaps, starting on the left of the case. That left me with no more wood filler, and two-thirds of the piano yet to be patched. (Not to mention I have to glue the case together again.)
Weighing chunks. A pound here, a pound there, and soon, you're talking heavy!
It doesn't sound like much, I know, but you can look at the pictures and see, it really was four full weekends of work just to get that far. Finally, though, the cosmetic (and comparatively easy) work can now begin.
Patching has begun. Long, long way to go, I know.
By the way, the bruise on my hand? It formed a lump that I ended up taking to my doctor. He says I definitely fractured a bone in my hand when I hit it with the hammer back in late June. Some of the other bruises that were not broken bones are shown in the photo below.

You don't have to look too close to see my arms are pretty mangled.
I haven’t thrown out all the pieces of the piano that I removed. Yet. I’m saving select things in case I find some use for them as I assemble the piano into a bar. If I don’t, out they go. I still have to drive all the metal to the scrap yard and collect my $20 (?) for that. 

Wednesday, August 8, 2012

Keys to the kingdom

Sometimes, you just can't hack away. Especially if you've broken a bone in your hand, you want...need... must.... take a break. (Oooooooooh, that hurt!)

When I just couldn’t stand to do more grunt work of tearing up the piano, I did some “artistic” work preparing the keyboard. The first step was to glue down all the keys to stabilize them for cutting. I used contact cement for that, and managed to start and finish the gluing process just prior to a rainstorm that would have probably ruined the keyboard if I had started five minutes later. The next day, even though the keys appeared to be securely glued down (which was a tedious process to get the spacing right as well), I put some more glue on them to make them a little more secure. The following weekend, I moved back outside and took my circular saw to the keys. 
The first cut is the most unnerving, but once it's done, surprisingly, reassuring.
Even with the lumpy pivots in the cutting track, it made quite short work of the key arms.

From here, there's no turning back.
I then removed the rest of the metal from the frame and cut it down to size, right behind the keys. 

It was a surprisingly quick process and I ended up with a pretty good looking, short, compact, antique keyboard. 
You can't tell me that doesn't look cool. Admit it: You wish you had one to put on a bookshelf at home, just for a conversation piece.
I still have to do some finishing on the cut edges and I’m going to pour some acrylic or something in the cracks to make them even hardier, but I’m quite happy with the result and I think it definitely gives the bar a unique look.

Tomorrow: The feeling of emptiness...

Tuesday, August 7, 2012

No longer a piano, not yet a bar


Where has the time gone?

Here it is, over a month since my first entry on the dismantling of my piano. In between, I’ve been to Japan (one week) and Mexico (three days), and, I’ve actually succeeded in completely gutting the piano. I’ve kept detailed notes, taken pictures at each stage, and weighed everything that’s come out of the piano so I know what it used to weigh. And still, I call it a piano, however, it is not a piano and will never be a piano again. (Mrs. S calls it “junk”, which is essentially correct.) So, here’s the rundown (with photos):
Here's what some big chunks and a bag of small chunks of pin board and support board from a 130 year old piano look like...

The hardest part of dismantling these antique square grand pianos (I have determined) is getting down to the base wood. With animal glue bonding the boards, and having dried over a century ago, it becomes nearly impossible to tell where one board ends and the next starts. So, it was with my Stone. The key was getting down to the base. This had to happen from the sides, because the side support blocks both tied in to the back support block. Not surprisingly, in my hurry and resultant frustration to get down to the base so that I could speed up my progress, I pulled a little too hard on the pry bar and ended up cracking the case. 
Left rear corner: Cracked like a gang-banger's head at a homecoming football game...

Without being able to use the case for support against the pry, I basically had to extract each board in chunks, piece by piece. I ended up with four bags of chunks, and then some, but eventually, I was left with just a piece of pin block on back support blocks. Again, I was confronted with space issues, as there was no good way to get the pry bar or claw hammer between the support boards and case. Eventually, I figured out a chisel was better at getting between boards than a screwdriver was, even with the small (6” long, half in diameter) one that I had in my tool box. I soon succeeded in prying a piece from the rear right pin block, and from there, I was able to just work my way across the back, pulling off chunk after chunk of the pin block and support boards. 
Look closely: Upper pin board piece separated from the case, held out by a screwdriver (the one with the broken handle).
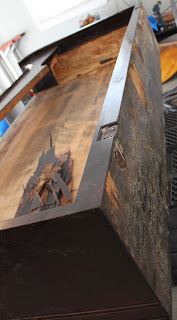
Two weekends of this left me with an essentially empty, but badly scarred, piano case. 

Tomorrow: More gutting, and some artistry (with photos...of course!).

Wednesday, July 4, 2012

Toe-to-toe

The piano and I went at it with gusto over the weekend. Given the number of bruises, contusions, strains, cuts, sprains and aggravation I suffered, I would say the piano was the winner of our first few battles, however, when all was said and done, I didn’t have any pieces of me missing. My superior mental prowess is proving the difference.
The piano about to be turned sideways on the rug for moving. Notice the plastic totes on the right, used for height adjustment and to keep toes from being broken.
The first and arguably hardest step was moving the piano to the garage. Mrs. S was not able to lift one end of the piano, and I was not one to risk injuring her or myself to do it. I came up with a clever system of plastic support totes, where I could lift one end of the piano and Mrs. S could move totes in and out to change the height of the piano. We were able to lower it to the floor and onto a carpet to slide to the garage door. From there we duplicated the tote system in reverse, and put the piano back up on the sawhorses. Then I laid into the sucker.

First chunk removed (left)
After breaking one of the teeth off of my oscillating tool, and then breaking a handle off of a screwdriver, I began to conclude that I was not going to beat the animal glue with brute force. Seriously, think about a horse’s hoof. Now imagine you liquefy the hoof, squish it between two boards and let it harden. Now imagine trying to pull those boards apart. Right, not happening. But if you were to soften that hoof again… And what softens animal glue? Water.
Broken screwdriver. F-word. Mother f-word, f-word, s-word. Fuck.
So I used my oscillating tool to put strategic grooves in the wood and seams, then squirted them full of water. Then I waited a minute or two before taking a screwdriver or pry bar and pushing or pulling. It wasn’t long before I had managed to chip out a bunch of splinters from the solid block on the right, and eventually, I broke through the thickest part of the pin block on the left. I was pretty much able to lever out the heavy anchor block. (Some bits of it are still intact.) Then I took a hammer and pry bar and went at the crack and seams of the pin block. I had about a third of it removed after about an hour.

Chunks of piano.
The heat is making the work slow going, but from today, I have five days off. I spent today removing the slatted support block on the right. My goal is to get the piano finish-ready by Sunday. If it cools down enough, I may even finish the wood cabinet. I have an idea for installing a bottle rack and mirrors and a felt surface. If I can just get the rest of the wood out. I also have a brilliant idea for finishing the keyboard, which I’ve started working on in the evenings while watching TV. It won’t be long now…

More piano chunks

Friday, June 29, 2012

Why to not drink while taking a piano apart


Because you might hit your hand with a hammer.

Yes, I did.
See it? Under the index finger connector knuckle. Frozen hamburgers, ibuprofen, and cold Diet Cokes kept it from being a lot worse.

Tomorrow it’s out to the garage. I’ve got a 5K race in the morning (before it hits 106 like it did today), but the rest of the day is for me to get intimate with my piano and my as yet unused Porter and Cable oscillating tool. I haven’t exactly figured out how I’m going to get the thing out to the garage, but I have some vague idea of using a graduated system of plastic totes from work to build progressively smaller stands until I can just set the piano on a rug and move it outside. It shouldn’t be too hard. We’ll see.

Thursday, June 28, 2012

Animal hide glue, spar varnish, a silver dime, and me

I have succeeded in removing the sound board from the piano. I don’t know if every square grand piano from the 1800’s was built like mine, but this piano is a very robust piece of furniture. As I said in an earlier entry, the screws are not what holds the piano parts together, it’s glue. And not just any glue: natural animal hide glue made from connective tissue (skin, tendons, ligaments, hooves) of animals (usually horses). This stuff gets down into the grain of the wood, adheres to the wood on a cellular level, then hardens into a chunk. Good luck pulling apart any two pieces of wood bound with this stuff after it dries. In fact, the only thing that is saving me during this project is the wood of my piano is so dried out, it splinters and fragments all around the glue, more or less allowing me to separate everything piece by piece.

It's not history, but it's mine.
 As for the sound board itself, it too fragmented at crucial junctures, and once it had loosened, I was able to pry it out. It is another impressive piece of work. Heartening was the fact that my varnish job was as solid as the original varnish job. I used authentic ‘spar’ varnish and when pieces of the sound board cracked and splintered, pointy little “nails” of hardened varnish flew everywhere, sharp as needles. Again, when they were building these pianos back in the day, they really knew what they were doing.

Check out the spar varnish splintering, bottom right...
 Once the sound board was removed, I was able to see the entire inside of the piano case in the light of day for the first time. A small glimmer in a pile of detritus caught my eye, and lo and behold, good news is, it’s money. Bad news is, it was just a dime. Good news is it’s a silver dime (1957). Bad news is, there’s nowhere left for money to be hiding in my piano case.

Animal ligaments are strong? Well, stronger than wood, anyway!
 Tonight, Mrs. S and I are going to put the piano up on saw horses so I can remove the legs. Then Mrs. S and I are going to see if she is strong enough to hold up one end of the empty case so that she and I can move it ourselves. (She doesn’t know any of this yet.) If not, I’ll need to recruit some bodies to move the thing out to the garage for the hollowing out for the digital conversion or bar (depending on how the hollowing out goes). I have an oscillating power tool that I received from Amazon and haven’t written a review for yet, so I’m using this project to kill two birds with one stone. I’m sure hollowing out an antique piano is more than sufficient enough to put a cutting and sanding tool through its paces.

 This project is taking shape rapidly and smoothly, and I’m still joyous and inspired as the work progresses. How could I not be?

Tuesday, June 26, 2012

How your brain works


Yesterday and today, I tackled the removal of the sound board (and am still working on it). Although I pretty much expected it was glued into the frame, I sort of thought there might be some screws that secured portions of it to the frame. Because I have been removing a number of screws but the sound board is still firmly and securely attached to the piano, I’m beginning to suspect this is not the case. In fact, it seems to me that the purpose of any screws was probably to hold the wood together while the glue set. In any event, to make everything come apart as easily as possible, I’m removing the screws. In the space between the deck and the frame – a gap of about 6-8 inches – there are a number of screws in the bottom of the sound board. Their removal, as I detailed yesterday, requires a special short screw driver. It also requires a mirror and a flexible brain.

Pedal lyre, anyone? I hear they make great lamps...
See, in order to fit the tiny head of the screw driver into the slot, you need to see the slot and screw. My head, however, is not tiny and does not fit into that space, and even if it did, my 48-year old eyes could not possibly focus on anything so small in such a dark space, reading glasses, bifocals, regular glasses, or no. So, I borrowed one of Mrs. S’s compacts, shoved a flashlight into the cabinet, and tried to loosen the most accessible screw.

There are the levers that are operated by the pedals and move the stuff inside the piano. (Not anymore.)


Long story short: your brain is not equipped to do anything while looking in a mirror, other than brush your teeth, comb your hair, shave, or put on and take off make up. It took me a full five minutes to get the first screw out. “Righty tighty, lefty loosy” is critical when unscrewing 130 year old screws in a mirror. What your hands are doing, what your eyes are seeing, and what your brain interprets to be happening, are all three completely different things. Then, when the screw driver slips out, your brain has a predetermined approach for reinserting the driver in the screw slot, but again, the mirror tells a 180-degree lie, and your brain struggles. Eventually, you get it back in the slot. Then you do the “lefty loosy” drill again, then your brain fights, then the driver slips. But, after five minutes of repeating this, the screw comes out.

Now you move to the second screw. You make the mistake of trying to slot the driver looking straight on from under and in front of the piano, and your brain goes back to normal, and you struggle. You move the mirror, try again. Three minutes later, the screw is out. The third screw takes about a minute and twenty seconds. The next ten or fifteen screws take about five minutes total. Really, it’s amazing how quickly your brain adapts to the new requirements of screw removal in the dark narrow space with a mirror. After a half dozen or so, you can slot the screw by feel and don’t even need the mirror, and when you use the mirror to locate the next screw, your driver-grasping-hand goes straight to the hole with the screw. This morning, I feel like the single most dexterous person on the planet.
Possibly the serial number of my piano. Gotta admit: my freehand Sharpie work is pretty good!

Today, we’re doing carry-out Greek for dinner, so I’m expecting to have time to take lots of pictures and weigh parts, including the sound board, which I’m expecting to have enough time to completely remove tonight. And there’ve been no takers for the harp, so I think we need to find a scrap yard before the weekend, too. There isn’t much metal left in that behemoth any more. And, I still feel very wonderful about this project. Once I extract more of the wood and move the piano to the garage, I’ll feel even better.