Thursday, September 27, 2012

Al…..most………there…….


Last weekend, I decided a few things: I’m sick of my garage being filled with tools and a broken down piano. I’m sick of sacrificing my piano playing time for DIY labor on a piece of furniture. I’m sick of not looking for pianos because the one I have is not doing anything practical with the space it occupies. I just wanted the thing to be done with! So Saturday and Sunday, both, I put in whole mornings and partial afternoons and I have, at long last, wrenched the bar out of the piano, and have reached the point where, although I’m not finished, I’m down to just polishing and primping. The manly man work is done.
Not bad, if you don't look too close...
 The hardest part was getting the cheap felt to cover the surfaces, especially the back. Let’s face it: $3 a yard doesn’t buy you much quality when it comes to felt. (The one and half yards I bought for the piano when it was still going to be a piano cost over $100. The six yards I bought for the bar: $14.) Once I had the back covered, doing the inside was much easier. I used staple gun staples to hold everything down, and used decorative thumbtacks everywhere else. The result was reasonably neat and effective.
Nice neat felt, surrounded by trim, shelf brackets, and decorative tacks. (Note the height adjuster sound board nibs, already installed on the serial number shelf.)
 Installing the bottom in the bottle well was tricky, but certainly not hard. The hardest part was turning the piano over to drill the holes, but now that it is so light, even that wasn’t particularly difficult. The effect using the old soundboard is exactly what I was hoping to achieve.
Deep enough for those tall bottles of booze, except where the hitch pin block is, upper left. (That's according to plan, folks, believe it or not.)
 The shelves were another matter. There’s no good way to get tools into the crevices to drill holes and turn screws. I ended up installing bits of pin block sideways into the piano as shelf supports. I recycled the damper board as a shot glass shelf, and when the OEM serial number shelf didn’t turn out as expected, I installed the old music rack over the top of it, leveled with soundboard spacers and pin block (again). Both these shelves turned out quite nice.
Damper board as shot glass shelf. Note the trim in the corners already installed
With the keyboard, I got lucky. The rod I used to insert into the space wouldn’t go in with everything screwed down, so I took everything apart and screwed everything back together with the rod sitting about where I wanted. As I was tightening the screws, something suddenly snapped and settled, and boom! The rod was in place, looking nice and functioning exactly as I hoped it would. That almost never happened during the two years I was working on this piano/bar.
Music stand as shelf. Who wants a "Between the Sheets (of Music)"?
 All that’s left now is to polish it, screw the keyboard in, install the lights, and put the top back on. It’s about two hours of work at most. Then, just fill it up with booze and watch my guests’ eyes when I open it up the first time.
The just-about-finished product 
I’m so glad this is almost over.

Thursday, September 20, 2012

Why Quentin Tarantino is a millionaire...


and I’m not:

Because he shows characters viewing their situation unrealistically, then shows the reality. I, on the other hand, live that way. To wit, here’s what I wrote at lunchtime today, thinking I was getting a jump on things:

(Quote)

Tonight I was excited enough about what was formerly my piano to work on it during the week. With Mrs. S gone to some women’s business awards dinner and nothing much else to keep me occupied, I decided to put some time in on the bar on a Thursday night, taking advantage of the cars being already out of the garage and the cool evening air as well.

I started to put the felt on. I decided not to use glue, as it would be too messy and too permanent, and instead went with semi-decorative thumbtacks that I pounded in with a hammer with a piece of felt on the head. This proved to work pretty well and looks good, too. On the inside, I pulled the felt tight like a pool table surface and used my staple gun only at the edges and more decorative thumbtacks where needed. In the end, I glued just two pieces – the smaller ends in the bottle well. Everything else is stapled or tacked into place.

Once the felt was in, I glued in the serial number board over the hole on the left side of the piano. I also nail-gunned in the trim pieces to cover the felt seams and edges. While the piano was turned upside down for felt installation, I drilled holes for the shelves and went ahead and screwed them securely into position.

Before I started work on the felt, I taped and sealed (as good as I could) the bottom of the keyboard and I went ahead and poured acrylic on it to not only to secure the keys, but also to make them a little glossy and possibly as a prelude to building up the keys high enough to be level with the black ones so it acts as a kind of shelf (I’m not sure this will even work; I need to see what the acrylic dries like in the initial stages.)

All in all, it was a pretty productive evening.

(Fade to black, and, cut. Zoom in on my face, speaking sincerely into the camera.)

That’s what I imagined would happen tonight. What really happened is, the felt wasn’t cut straight, so I couldn’t align the easiest-to-align piece and ended up giving up because I couldn’t see very well in the dark. The liquid acrylic washed off the tape on the bottom of the keyboard and I ended up brushing out as much of it as I could. The keyboard is basically undamaged, but it’s not coated in acrylic, either. And mosquitoes positively ate me alive the entire time.
"Who's the sucker? That's RIGHT. I AM!!!!!!"
...and, CUT!

Imagination: The bar is practically done. Reality: No progress at all to speak of, lots of mosquito bites to show for the effort. Sucks worse than a mosquito.

Sunday, September 16, 2012

Ready for the final push


The piano is gutted. 

The hole is cut. 
Last look at an empty piano with a hole cut in it, before the final push
The felt is purchased. 

The case is stained. 

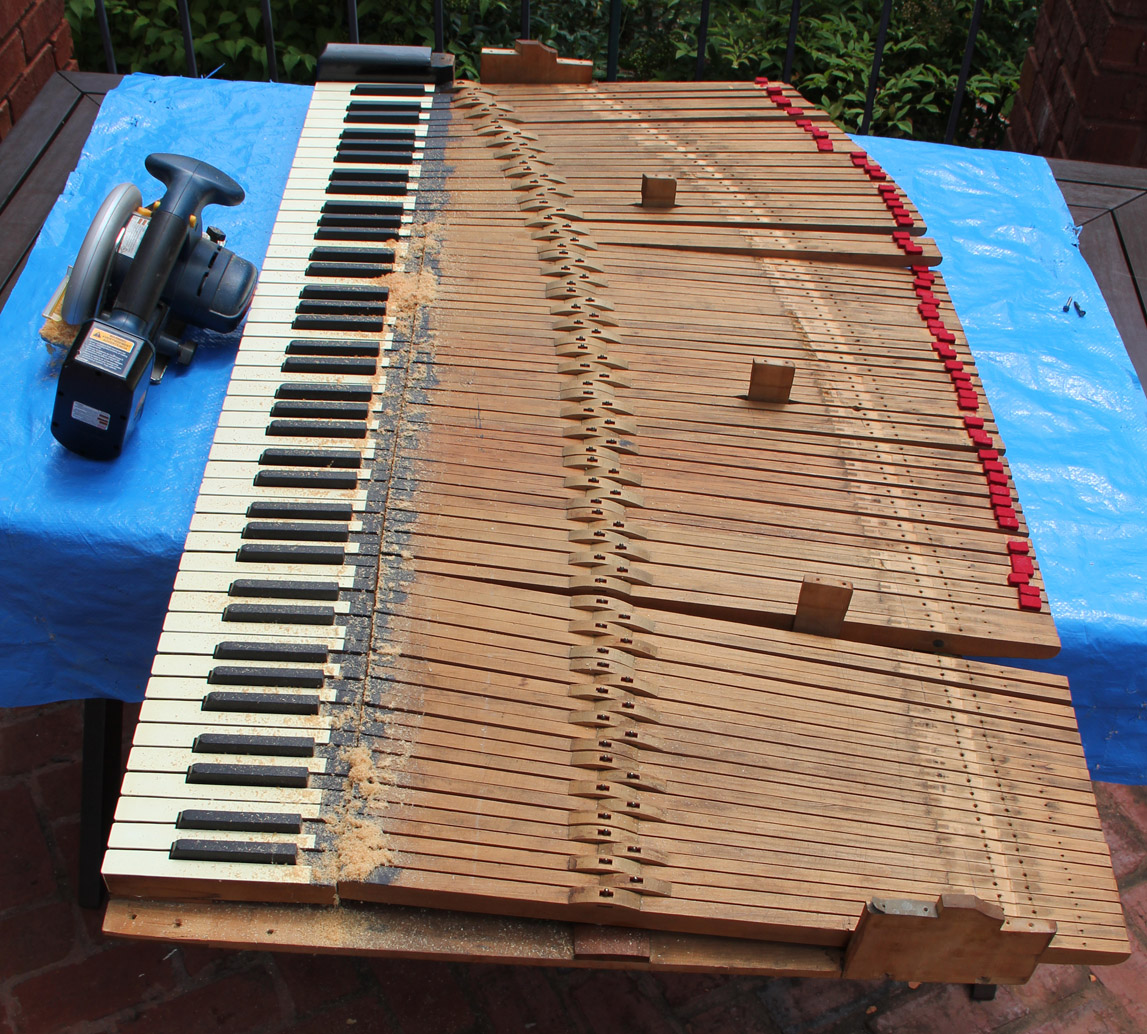
The keyboard is trimmed. 
L to R: The damper bar (shot glass shelf), the serial number board (hole cover), the reduced keyboard (thing to lean on)
The ends are painted. 

The trim is re-stained. 

The shelves are varnished. 

L to R: Sound board (bottle shelf), rod (keyboard spacer for glued down keys), keyboard blocks (original), trim (felt holder), second serial number board (auxiliary shelf)
The polish is ready. 

The plan is formulated.

I am ready for the final push. Next weekend, the hunk of antique furniture that was a piano becomes a bar.

Sunday, September 9, 2012

Another thing very few people have ever done

Believe it or not, I’ve been making good progress on my bar. Mrs. S. and I had a long discussion about whether to open a hole in the piano base to accommodate tall bottles of liquor or to install racks of some sort to lay everything on its side. I had two concerns: Having enough space to lay down that many bottles, and the cost of the racks. My original idea was to buy one of those modular racks and drill holes at an angle to allow them to sit diagonally. A rack set for 8 bottles (since four spaces would become unusable) would have been around $20, so to put up 30 bottles would have cost $80. Mrs. S’s rack idea would have cost a little less or a little more, depending on which racks I ended up buying. In the end, I decided opening a hole was going to be the most economical and would also leave me with the most space inside the bar for glasses, stirrers, and other accoutrements.

So I set to work.

I started at the hole for the sustain pedal rod and measured an approximately 12” x 36” slab. I measured and re-measured multiple times, not only because of the “measure twice, cut once” rule, but also to make sure I would be left with enough bottle space without endangering the overall integrity of the piano. Had I had proper tools, this job would have been a breeze and probably finished in about an hour, but because I was stuck with the circular saw and reciprocating saw in my homeowner’s DIY drill kit with low torque and weak (old) batteries, it took me two days with constant and steady recharging and I still did about a quarter of the job with a hand saw. And of course, my wood slab had a slight taper, so I tore a bunch of wood on the bottom of the piano getting the slab out, but when all was said and done, what was formerly my piano had a big hole in it and was 21 pounds lighter than when I started to open the hole.

One piano, with hole, coming right up. Make that a bar with a hole... 
While lying on the floor admiring my work from underneath, I noticed the sound board laying against the back wall. It gave me an idea. Rather than buy a non-descript, uninteresting piece of wood for the bottom of the hole, maybe I could recycle the sound board instead. Not only would it add interest to the piece, it would keep me from spending more money. I measured off a section, cut around the hitch pin block, preserving a piece for decoration, then cut it down to size. I sanded it and varnished it. It will need to be re-varnished once more before installation.

Actually, a pretty nifty piece of decorative wood, if I do say so myself.

I spent a lot of time sanding the inside of the bar, just trying to get everything close to even. I’m going to cover everything with sheets of felt, since there’s really nothing I can do with the worn, tore up, patched up wood on the bottom and sides. I still plan to install some mirrors and lighting as well (the last money I will spend on this beast).

Nothing but cosmetic work from here on out. Lots of scraping, sanding, gluing, covering, and refinishing. I think one or two more weekends and one or two weeknights should let me move the bar back into the house by the end of the month. 

I am getting close.

Thursday, August 9, 2012

On the face of it, really, what is veneer?


This entry is a continuation of the previous two. If you haven't read them, you should check them out.

Or, be confused. What do I care?

The last pile of chunks in an otherwise empty shell of what was once, a piano.
This past weekend, I went back to the grunt work and removed the veneer, also pulling out the last of the chunks I intended to pull out, and then rough smoothed (how do you like that oxymoron?) the inner surface with the scraper attachment on my oscillating tool. 
Veneer off. Notice the fragments, sitting inside to the left...
That means, I pulled off the obvious slivers and gouged pieces that made the surface uneven and then used my oscillating tool and 60 grit sandpaper to clean up every newly exposed surface. 
Exposed: The gutted result. As much as bar as a piano, or a casket, or, or, or...
I then deposited one whole sixteen ounce can of wood filler into the crack and gaps, starting on the left of the case. That left me with no more wood filler, and two-thirds of the piano yet to be patched. (Not to mention I have to glue the case together again.)
Weighing chunks. A pound here, a pound there, and soon, you're talking heavy!
It doesn't sound like much, I know, but you can look at the pictures and see, it really was four full weekends of work just to get that far. Finally, though, the cosmetic (and comparatively easy) work can now begin.
Patching has begun. Long, long way to go, I know.
By the way, the bruise on my hand? It formed a lump that I ended up taking to my doctor. He says I definitely fractured a bone in my hand when I hit it with the hammer back in late June. Some of the other bruises that were not broken bones are shown in the photo below.

You don't have to look too close to see my arms are pretty mangled.
I haven’t thrown out all the pieces of the piano that I removed. Yet. I’m saving select things in case I find some use for them as I assemble the piano into a bar. If I don’t, out they go. I still have to drive all the metal to the scrap yard and collect my $20 (?) for that. 

Wednesday, August 8, 2012

Keys to the kingdom

Sometimes, you just can't hack away. Especially if you've broken a bone in your hand, you want...need... must.... take a break. (Oooooooooh, that hurt!)

When I just couldn’t stand to do more grunt work of tearing up the piano, I did some “artistic” work preparing the keyboard. The first step was to glue down all the keys to stabilize them for cutting. I used contact cement for that, and managed to start and finish the gluing process just prior to a rainstorm that would have probably ruined the keyboard if I had started five minutes later. The next day, even though the keys appeared to be securely glued down (which was a tedious process to get the spacing right as well), I put some more glue on them to make them a little more secure. The following weekend, I moved back outside and took my circular saw to the keys. 
The first cut is the most unnerving, but once it's done, surprisingly, reassuring.
Even with the lumpy pivots in the cutting track, it made quite short work of the key arms.

From here, there's no turning back.
I then removed the rest of the metal from the frame and cut it down to size, right behind the keys. 

It was a surprisingly quick process and I ended up with a pretty good looking, short, compact, antique keyboard. 
You can't tell me that doesn't look cool. Admit it: You wish you had one to put on a bookshelf at home, just for a conversation piece.
I still have to do some finishing on the cut edges and I’m going to pour some acrylic or something in the cracks to make them even hardier, but I’m quite happy with the result and I think it definitely gives the bar a unique look.

Tomorrow: The feeling of emptiness...

Tuesday, August 7, 2012

No longer a piano, not yet a bar


Where has the time gone?

Here it is, over a month since my first entry on the dismantling of my piano. In between, I’ve been to Japan (one week) and Mexico (three days), and, I’ve actually succeeded in completely gutting the piano. I’ve kept detailed notes, taken pictures at each stage, and weighed everything that’s come out of the piano so I know what it used to weigh. And still, I call it a piano, however, it is not a piano and will never be a piano again. (Mrs. S calls it “junk”, which is essentially correct.) So, here’s the rundown (with photos):
Here's what some big chunks and a bag of small chunks of pin board and support board from a 130 year old piano look like...

The hardest part of dismantling these antique square grand pianos (I have determined) is getting down to the base wood. With animal glue bonding the boards, and having dried over a century ago, it becomes nearly impossible to tell where one board ends and the next starts. So, it was with my Stone. The key was getting down to the base. This had to happen from the sides, because the side support blocks both tied in to the back support block. Not surprisingly, in my hurry and resultant frustration to get down to the base so that I could speed up my progress, I pulled a little too hard on the pry bar and ended up cracking the case. 
Left rear corner: Cracked like a gang-banger's head at a homecoming football game...

Without being able to use the case for support against the pry, I basically had to extract each board in chunks, piece by piece. I ended up with four bags of chunks, and then some, but eventually, I was left with just a piece of pin block on back support blocks. Again, I was confronted with space issues, as there was no good way to get the pry bar or claw hammer between the support boards and case. Eventually, I figured out a chisel was better at getting between boards than a screwdriver was, even with the small (6” long, half in diameter) one that I had in my tool box. I soon succeeded in prying a piece from the rear right pin block, and from there, I was able to just work my way across the back, pulling off chunk after chunk of the pin block and support boards. 
Look closely: Upper pin board piece separated from the case, held out by a screwdriver (the one with the broken handle).
Two weekends of this left me with an essentially empty, but badly scarred, piano case. 

Tomorrow: More gutting, and some artistry (with photos...of course!).