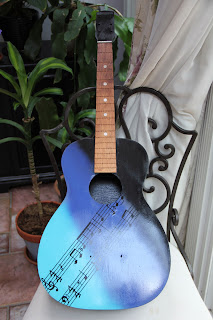
Once I got the “Chitlins Con Carne” music applied,
the only thing between me and a finished decorative guitar was time. I already
had purchased strings and polished most of the parts that I took off the
guitar. I bought a complete set of pre-radiused fret wires. I had rounded a
couple of mother-of-pearl dots by hand. I even had my stain for the neck picked
out. So, remembering the rule of “Google it first, then give it a try”, I was
ready to install the mother-of pearl on the fret board.
Or so I thought.
When I googled the installation of the
mother-of-pearl, the video I watched showed a clever way to find the center
line of each fret. Although it is quite obvious if you stop and think about it,
not only does the width of each fret shrink as they march down the fret board,
the neck itself tapers from wide to narrow from the body up. This means you
can’t quite find the exact center just using an eyeball measurement and
measuring across the neck. Fortunately the video showed a clever way to use a
straightedge to apply lines to narrow down the degree of difficulty in finding
the center of the target frets, and I soon had these all very neatly marked out
on my guitar’s neck.
 |
| THAT is a straight line! |
Next came opening the holes. I had some idea of
using a punch and just pounding the holes open then chiseling them out with my
Dremel tool, but I was a little confounded about how I’d smack a punch into the
guitar neck without snapping it. I thought about foam pads and dumb luck, until
the video came to the rescue again. The answer was: a Forstner drill bit.
Unfortunately, not only was I fresh out of Forstner bits, I didn’t even know
what one was. A little research, and I had my answer. Home Depot five miles
from home had a set (even though I only needed one) for $20. Mrs. S needed some
stuff for the yard, so the next day we made a hardware run and I picked up my
bits and Mrs. S picked up her pieces.
 |
| Pretty straightforward (get it?). |
With my centers clearly marked, opening the holes
was a breeze, especially since I still had all my painter’s tape applied from
when I painted the guitar. I had to work on the dots to get them closer to the
right size, but once I got them close, they were easily installed. I stained
the guitar neck before applying the dots.
 |
| Stain is on. |
I didn’t have a big issue getting the dots in, but
because they are hand-rounded and the holes were uneven depths, once I had the
dots glued in place, they required some sanding down. Of course, I re-taped
around the dots while sanding, but I still managed to scratch the neck in a few
places. I decided to use some stain touch up for hardwood floor repairs, but
this turned out to be a lot darker than my first stain. No problem. I rubbed
down the whole neck with the touch up, and ended up with a nicer, warmer finish
that accents the guitar without taking away from the motif. Sometimes things
just work out. The dots and neck look absolutely great. (To be honest, the dots
are not completely flat with the fret board, but this isn’t going to get much
playing and given how good they look, Mrs. S encouraged me not to mess with
them anymore, and so, I won’t.)
 |
| Compared to the whitewash sprayed dots, the mother-of-pearl truly adds some class. |
This weekend I will be experimenting with acrylic
and polyurethane coatings, fret installation, hardware installation, and
stringing. I believe I can finish this weekend, even though everything I have
ever believed about refurbishing this guitar, just like my square grand piano,
has generally not come true. We shall see.


No comments:
Post a Comment